
In hindsight, one could suggest the Gallipoli campaign (Turkish: Çanakkale Savasi) was two extended battles fought at the same time. Maybe three. It wasn’t supposed to be this way.
The “battle” – many months of sitting in a trench with the enemy in another trench … just over there – can be considered two actions. The Entente (mostly British) forces never achieved any of their goals and the intended joining of forces never occurred.
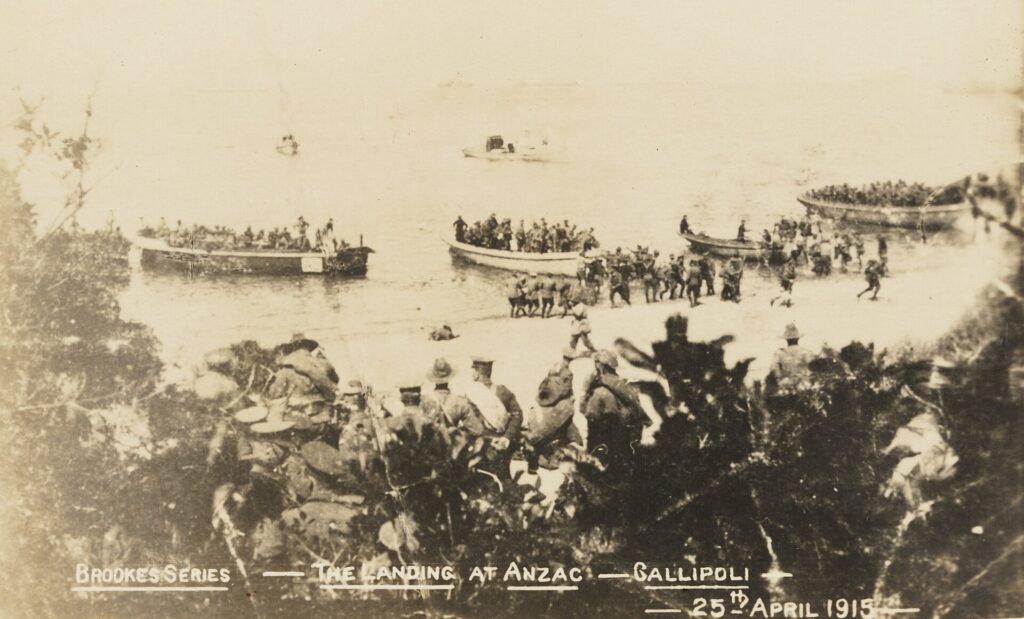
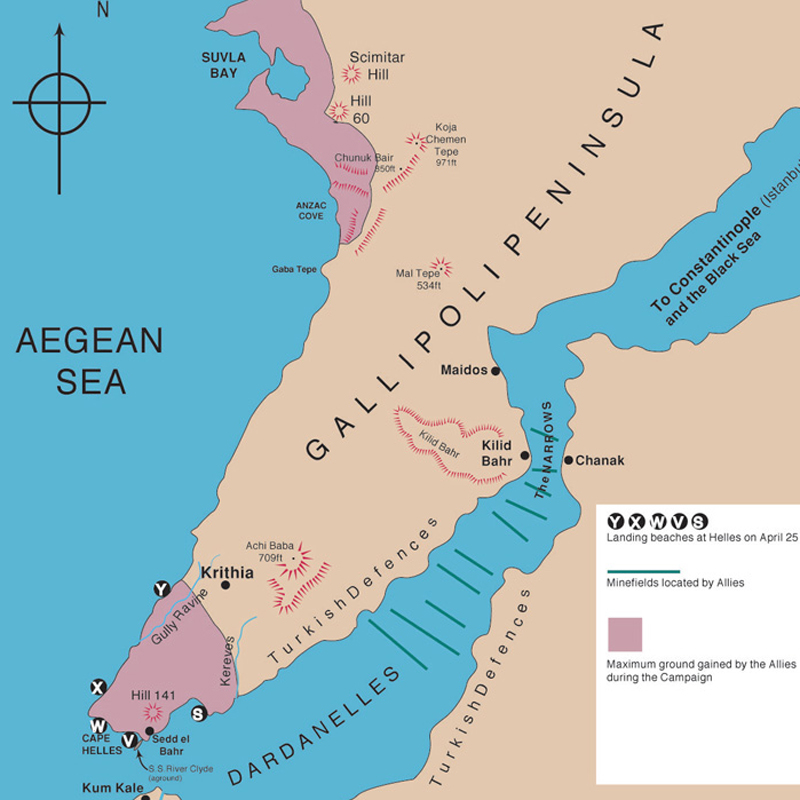
Early in the morning of April 25, 1915, a primarily British force would land at the tip of the peninsula (Cape Helles), take control of the high ground 5 or so miles to the north, destroy the defenses, and allow access to the Dardanelles Strait. Meanwhile, about 15 miles north on the Aegean side, a second force of ANZACs would land, take control of the heights, and force their way across the peninsula, blocking access for enemy reinforcements.
Those making the plans ignored the elevations and ruggedness of the terrain the ANZACs would face and the determination of the enemy – and lack of knowledge in the local commanders of how to achieve amphibious landings – at Cape Helles.
Effectively, the campaign had already failed by the evening of April 25th.
Yet – the beat went on …
Preliminary – Naval Operations March 1915
By late 1914, the war had bogged down to a stalemate in France. The Entente coalition – Great Britain, France, Russia – on one side, the Central Powers – German Empire, Austria-Hungary – on the other. Entente member Russia was on the east but access by the northern sea lanes were long and blocked by ice; the closer Baltic was under control of the Germans, leaving only the warm water route to the Black Sea the only feasible option to join together with Russia.
But the neutral Ottomans sent ships to attack the Russian port at Odessa in fall 1914 leading to the Ottomans joining the Central Powers, thereby blocking access to the Black Sea and isolating Russia.
Attempts by the British to get the Ottomans to change were fruitless.
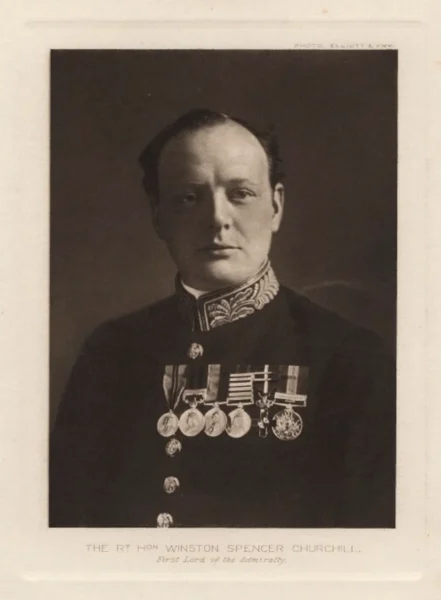
The First Lord of the Admiralty – Winston Churchill – proposed a naval attack on the Dardanelles … based on faulty intelligence of Ottoman strength in the region. In January 1915, the Russians asked Britain for help against the Ottomans – so the plan moved forward with the intent of forcing the Ottomans to move troops away from the Caucasus region.
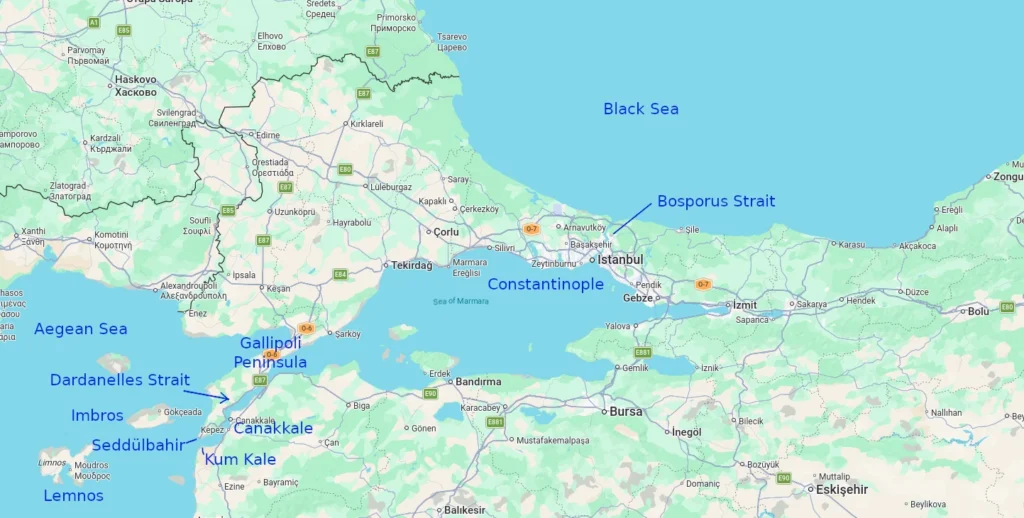
If the Entente powers could take control of the Dardanelles Strait (Turkish: Çanakkale Boğazı), they could takeover the Bosphorus Strait, capture Constantinople, cut off the Asian portion of the Ottoman Empire, thereby allowing access to the Eastern Front.
Entente generals and politicians expected their operation in Gallipoli to be over in a matter of days. First Lord of the Admiralty Winston Churchill: “A good army of 50,000 men and sea power—that is the end of the Turkish menace”.
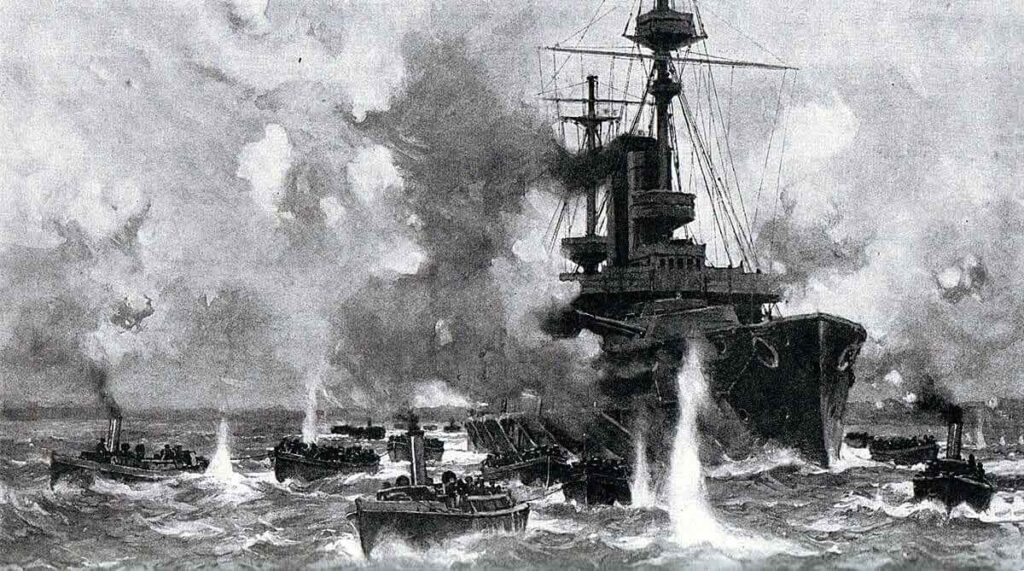
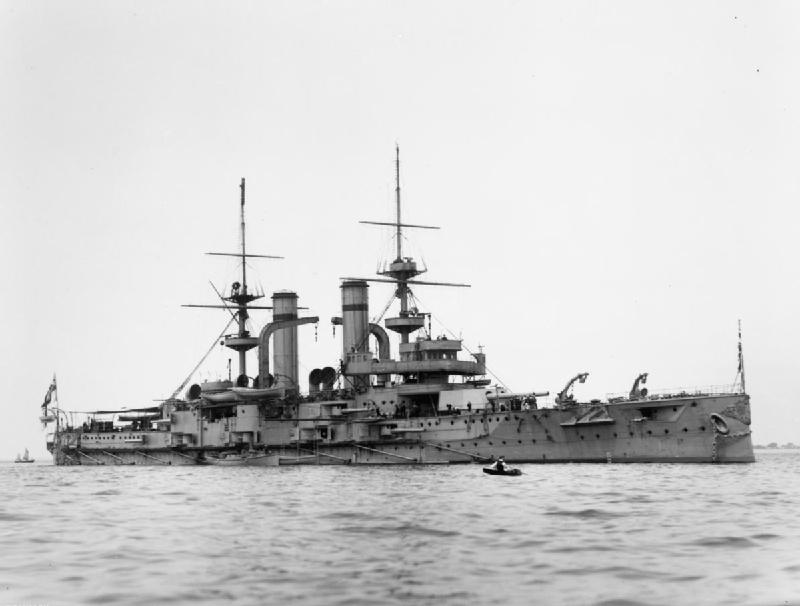
In February 1915, the Allied navies attempted to break through the narrows at Çanakkale. French and British warships attacked the coastal shore batteries with some success but bad weather prevented the use of aircraft reconnaissance and slowed naval activity. Marines landed to take out the guns at KumKale and Seddülbahir on both sides of the mouth of the Dardanelles.
Churchill pressed for progress; the fleet commander Carden replied that the fleet would be in Constantinople by mid-March. However, Carden was placed on medical leave and replaced by de Robeck.
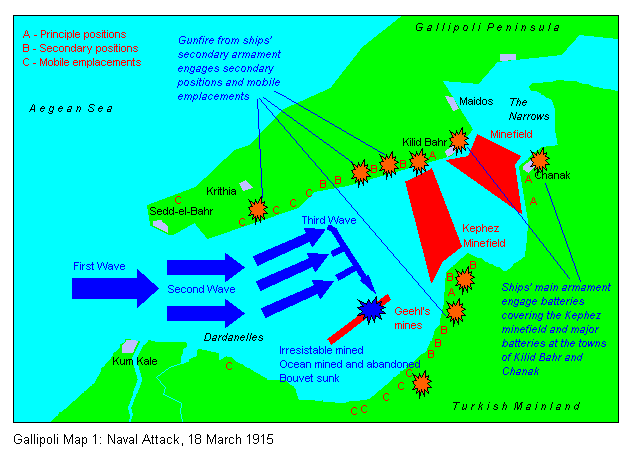
de Robeck sent 18 battleships with associated cruisers and destroyers to attack Çanakkale at the narrowest part of the Strait. The fleet knocked out some of the guns and all communications links but one of the French battleships struck a mine and sank. Entente minesweepers were chased away by shore batteries leaving minefields in place. The Turkish minelayer Nusret avoided British fire and unknown to the navy, relaid new mines.
Pushing the attack, two British battleships hit mines; one sank, the other forced to withdraw. Another British battleship sent to rescue the sinking ship was hit by a shell, ran into a mine, and itself sunk. An Ottoman hero came into being as a result of this action, Corporal Seyit Ali Çabuk.

They didn’t succeed.
The naval attack had fallen apart – nine battleships were sunk or disabled and the attack on Kum Kale a failure. It was considered one of Churchill’s – and the Allies in general – greatest failures … but, believing the Ottomans to be low on ammunition, plans for a land attack were made.
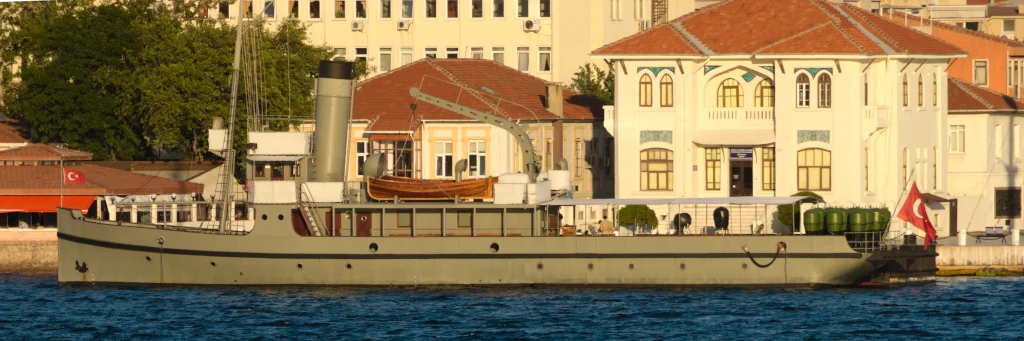
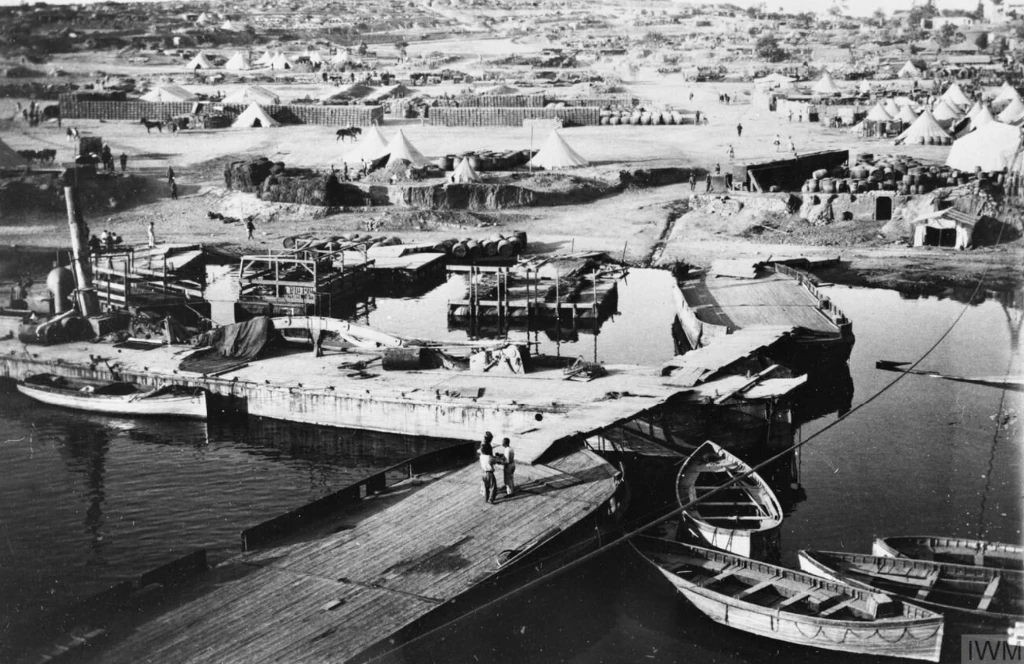
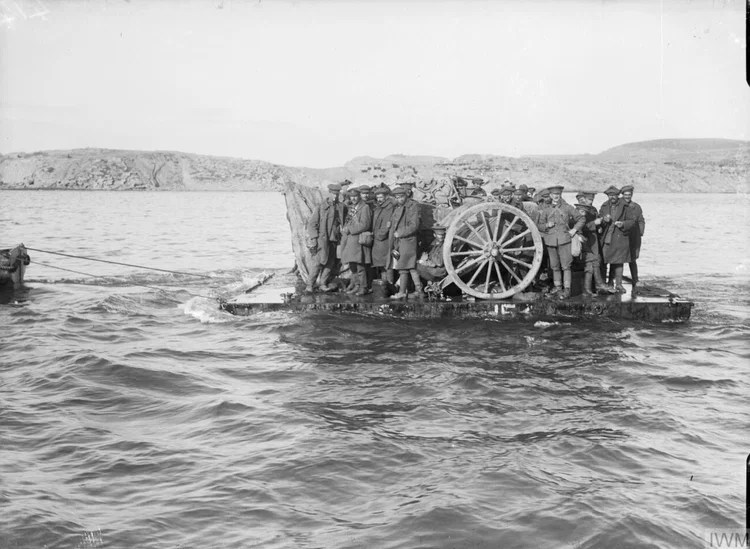
There is a new underwater park based in Canakkale where divers can visit the remnants of ships sunk during the campaign.

One of the highlight wrecks at the Çanakkale Historical Underwater Park
Onward, Into The Morass – April 1915
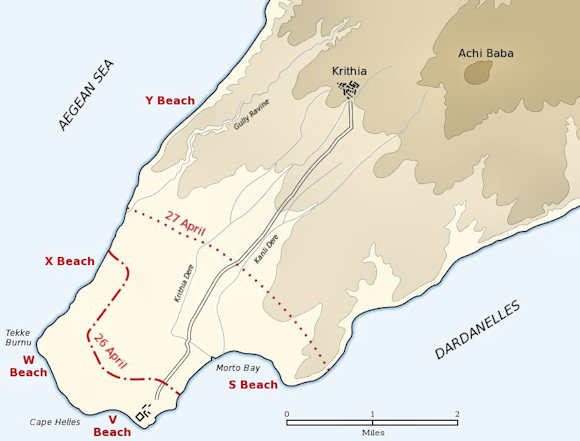
The main landings would be on the five beaches at Cape Helles and would begin early in the morning. The initial wave would be of 4,900 men, led by the landing of 2,000 at ‘Y’ Beach. The next wave would be 2,100 men landing from the River Clyde followed by a further 1,200 brought up by the towed landing craft at ‘V’ Beach. These troops were to secure the beaches in preparation for the landings of the main forces.
This plan was fine on paper, but not enough men, ammunition, and support were made available. Furthermore, the Ottoman guns were all still intact and their gunners fully alert to an incoming invasion.
The Gallipoli expedition was launched on 25 April 1915.
The target for the Cape Helles landings was to take the hill of Achi Baba and finally the Kilid Bahr plateau.
Those goals were never reached.
Battle 1: Main Landings at Cape Helles
The British forces launched their invasion at the tip of the peninsula – Cape Helles – on Sunday, April 25. Thirty-two landing craft transported the men at dawn to a beach lined with steep cliffs.
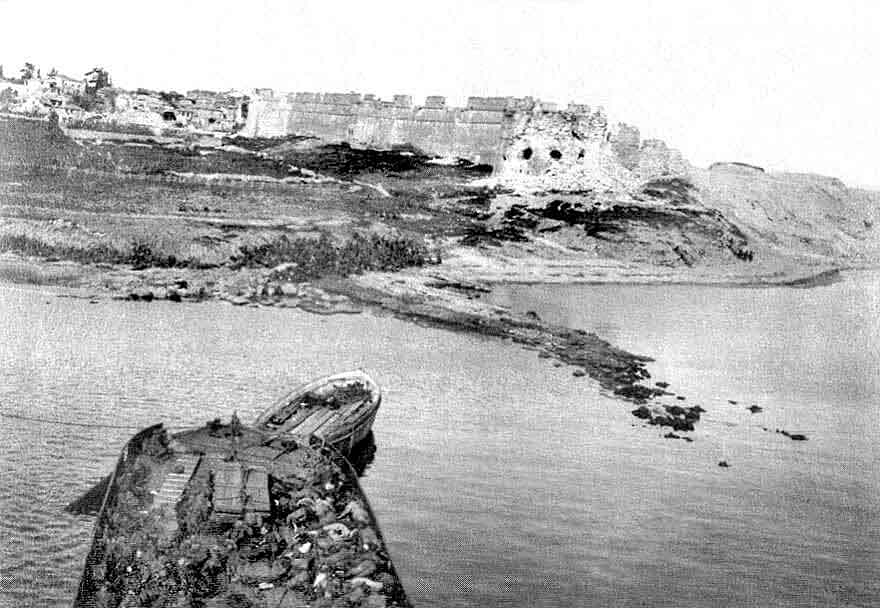
The first landings were at Beach W on the southern end of the peninsula. The landing was greeted by heavy fire and many of the men drowned as they leapt overboard into deep water, burdened by their full combat packs. Others died as they were shot down along the barbed wire defenses by gunman on the cliffs overlooking the beach. They suffered heavy casualties but pushed through an estimated 200 ottoman defenders to established a beachhead. Of the 1000 men that landed at beach W, only 410 survived.
The truth of the matter is the landings were doomed to fail from the start. The determination and tactical skill of the opposition, the brutal terrain, the difficulties of amphibious operations, and the defensive advantages of artillery, machine guns, and barbed wire had all been underestimated by the mission planners. There was no chance the combined forces of S and V beaches would have ever reached Achi Baba.

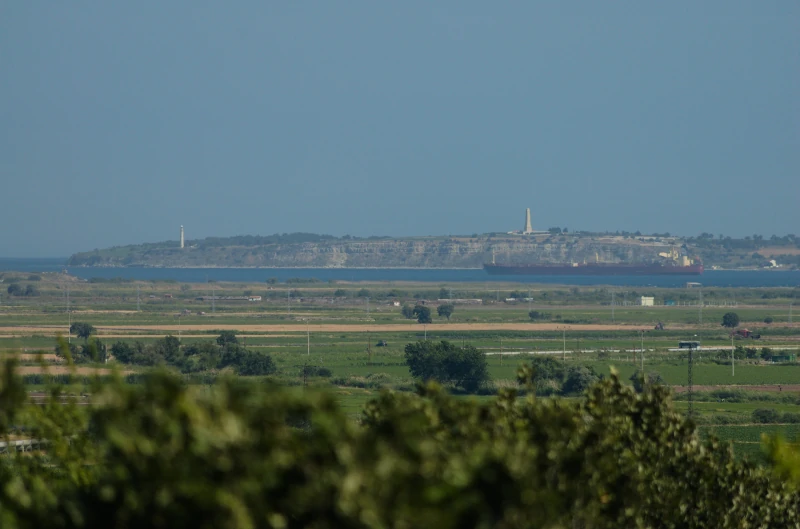
Ship blocking view of V Beach; W Beach to left
S Beach just out of sight to the right
X and Y Beaches around and up the tip to the left
The troops had to hit the beaches then scale the cliffs, all under fire
And there they stalled, never to get closer than 1½ mile from their objective.
Battle 2: ANZACs
Originally designated Z Beach, the ANZAC forces landed at what is now called ANZAC Cove. The fiercest, most desperate fighting took place between the volunteer forces of the ANZACs and the Ottomans protecting their homeland. The Ottomans won … but the cost was great.
Unlike the landings at Cape Helles, the actual landings just north of Gaba Tepe went well, and the ANZAC troops were able to move well inland. However, the Ottoman commander, Mustafa Kemal, had secured the heights of Chunuk Bair. The ANZACs were forced to retreat back to the beach – and try as they might, they never were able to effectively advance again.
The orders to the ANZACs required them to land one mile north of Gaba Tepe and push up the second ridge onto Gun Ridge (the third ridge). To the left, the forces were to secure Chunuk Bair, a peak at the north end of the third ridge, and the right to clear Gaba Tepe. As with the goals at Cape Helles, these positions were never effectively achieved during the Gallipoli campaign although they came closer than their fellows to the south..
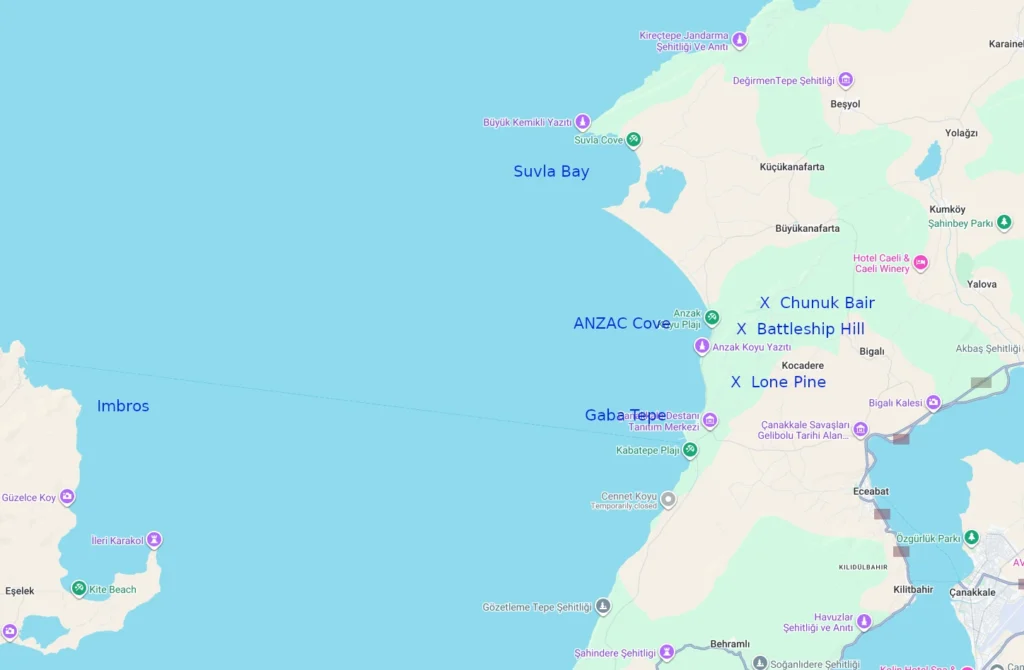
The area selected for the ANZAC landing was a sandy beach just to the north of Gaba Tepe. Most of the Gaba Tepe area continued to be held by the Ottomans throughout the Gallipoli campaign and was a constant source of harassing fire against the ANZAC bridgehead.
Some of the fiercest fighting of the entire campaign took place as the ANZACs attempted to take the high ground at Chunuk Bair. The rifle fire of the advancing Ottoman 57th Regiment forced the Australians to pull back from the western side of Gun Ridge. On the Australian left a small party of troops was holding Battleship Hill. The 57th Regiment also attacked in this area and the Australians on Battleship Hill and Baby 700 were driven back. ANZAC Casualties came to 2000 men – out of the 4000 initially landed.
But the Ottomans were also considerably disrupted and had suffered similar losses of around 2,000 men. Mustafa Kemal’s 19th Division was a ruin. All three battalions of the 57th Regiment had virtually ceased to exist. Kemal’s 27th Regiment had suffered substantial casualties and was virtually incapable of further action. The 77th Regiment, composed of Arab soldiers of unreliable loyalty to the Ottomans, had been committed to an attack on Mclaurin’s Hill and on meeting the Australian rifle fire had broken and fled to Gun Ridge.
Mustafa Kemal as division commander was observing the ANZAC movements from Chunuk Bail when he noticed the first group of Ottoman soldiers retreating in the face of the ANZAC advance. Tasked with defending Battleship Hill, they had run out of ammunition and were retreating. Kemal ordered them to lie down and use bayonets. The ANZACs saw this and hesitated the advance. Kemal ordered the entire 57th Regiment to counterattack toward Battleship Hill when he gave his famous order: “I do not order you to attack, I order you to die! In the time which passes until we die, other troops and commanders can take our place.” The regiment faced 8 battalions and lost over half of its initial strength slowing the ANZAC advance between April 25 and May 3rd.
During the construction of the complex the remains of two soldiers were found embracing each other, together with their pistol’s canteens, Identity tags and an amulet. From the identification tags and an amulet found on one of the bodies they were identified as Captain L.J. Walters (“Woiters” in the Turkish version) of the British Army and, First Lieutenant Mustafa Asım from Erzincan, the commander of the 6th company of the 57th Regiment.
The scent of Thyme carried on the wind
Stings my face into remembering
Cruel nature has won again
Cruel nature has won again
On Battleship Hill’s caved in trenches
A hateful feeling still lingers
Even now, 80 years later
Cruel nature
Cruel, cruel nature
The land returns to how it has always been
Thyme carried on the wind
Jagged mountains, jutting out
Cracked like teeth in a rotten mouth
On Battleship Hill I hear the wind
Say “Cruel nature has won again”
Cruel nature has won again
Cruel nature has won again
Cruel nature has won again
Maybe the song means more when you’ve walked the trenches and felt the wind. The ghosts still linger.
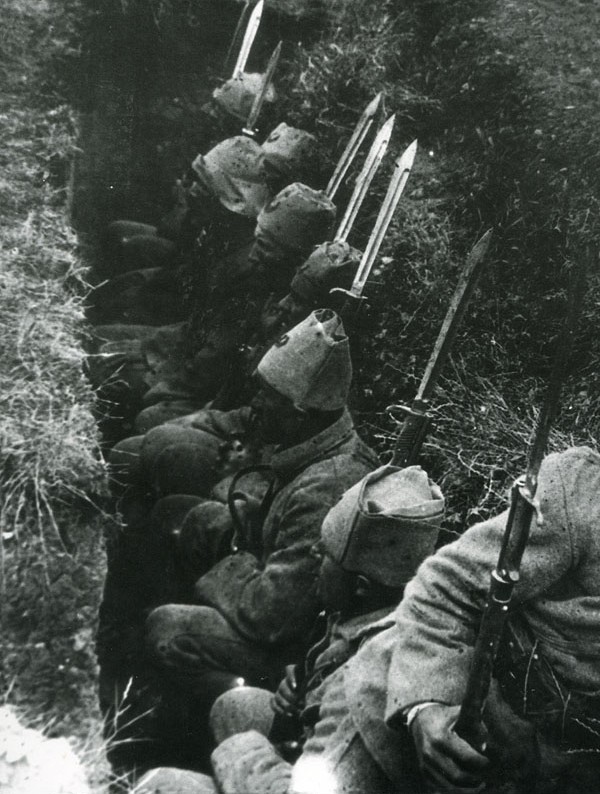
The battle settled down to one of attrition, with neither side in a position to advance on the enemy without heavy losses. Over the next two weeks, the Allies lost a third of their number. Reinforcements were continuously brought in.
Conditions in the trenches were as bad – maybe worse – as on the Western Front. Hot weather, cold weather, and endless wet weather which flooded the trenches, bodies of the decaying dead serving as floors and tables, inadequate clothing, erratic food supplies, and the necessity to ration water were just some of the daily difficulties. With poor hygiene and sanitary facilities and nowhere to bury the dead, soldiers soon faced a high risk of catching dysentery. One Australian soldier wryly remarked: “The actual fighting was the easiest of all“
Their food consisted mainly of canned corned beef while the Ottomans received meat, vegetables, and fresh bread from nearby villages.
Australian private Henry Barnes recalls an enemy charge against the ANZAC trenches:
The Turks were throwing bombs as well as rifle fire and it was very difficult to avoid the occasional man that came over. There was one fell right in front of me – he came over bawling out something and he practically – he was shot by me and the fellow next to me, two or three of us shot at the same time, we were rather bunched around the entry to the trench. He came through practically on top of my bayonet and – he was a very big man – and came down right on top of me and none of us could lift him out. He was too heavy to lift three feet while you kept down out of the range of fire, and literally, I sat on that Turk for two days – we ate our lunch sitting on him. We were eating bully beef and biscuits.
And there they sat, down on the beaches with the Ottoman forces on bluffs above, up in the trenches providing targets to the Ottoman snipers. The Ottomans were able to bring in more forces from other fronts. The ANZACs were on their own, sometimes left without orders or direction.
Getting ashore was not that hard. Hanging on, up on that second ridge, for eight months – that was the hard part. The ANZACs defended absurd positions like Pope’s Hill, with a cliff behind them and the Turks a few yards ahead of them.
They looked after each other: Gallipoli was all about your buddy. They kept their good humor as indicated by a cheerfulness in soldiers’ letters; something rarely evident in letters from France. There were no rear areas: men were subject to sniper fire and artillery even when off the line. The food was unspeakable and almost inedible. The flies and lice were a plague for all – privates and generals. Up to 70 per cent of the ANZACs suffered from dysentery. Men who went to Imbros were amazed at sounds they hadn’t heard for months: a woman’s voice, a dog’s bark, music.

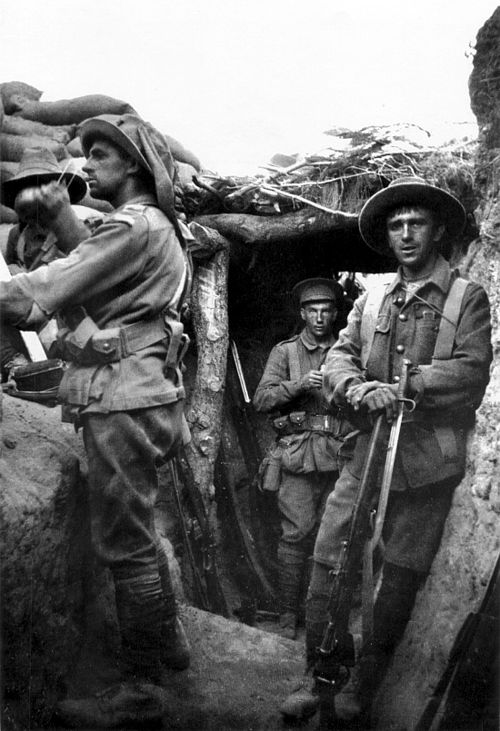
Trenches were dug and destroyed – one side over-running the other and building or digging into the former works. The Australians brought in mining engineers to construct front-line defenses. The remnants of those trenches still exist; they grew so complex that men could become lost within them – and dared not look out.
The trenches were well separated in France; not so at Gallipoli. The combatants were sometimes as much as 200 yards apart but at the highest point – Chunuk Bair – the lines were separated by only a few yards; close enough that grenades could be tossed into opposing trenches. Sometimes, the grenades were tossed back. Closer than the lines at Cold Harbor.
Attacks would sometimes occur in waves as in the west, but like the west, machine guns usually halted the attempts. There was essentially no medical care; the wounded would die of exposure and thirst laying in no mans land. Bodies would collect in piles, not collected for long lengths of time.

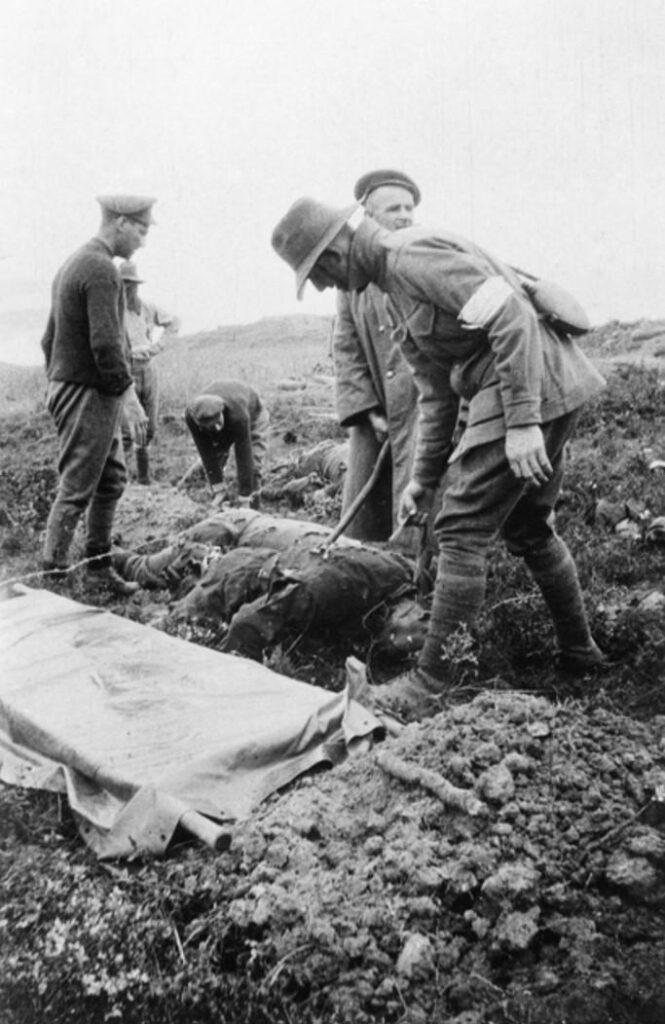
Conditions grew so bad that a truce was agreed upon by British and Ottoman combatants in late May to collect and bury bodies; the only officially sanctioned truce to have occurred during the Great War (the Christmas truce in France was not sanctioned).
So many had been killed in what became no man’s land between the opposing trench lines during the weeks following the initial invasion that the bodies of several hundred ANZACs and Ottomans lay rotting out on the hillsides above what was now called Anzac Cove. No man who died – or was simply wounded – in no man’s land could be recovered or buried; to try was to attract snipers, machine-gun fire, or shelling.
The truce was called to remove the corpses … to allow room for more corpses to be added to the final toll.
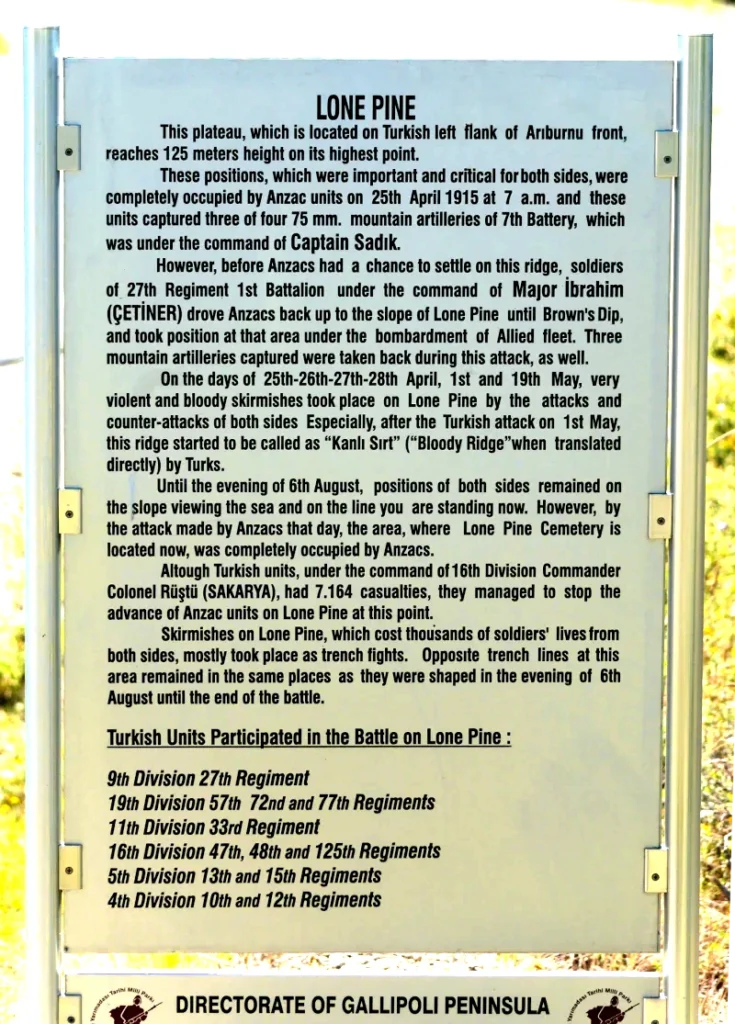
Lone Pine (aka “Battle of Bloody Ridge” (Turkish: Kanlı Sırt Muharebesi)
The campaign was a stalemate. An attempt was made on August 6 to bust the stalemate and pull Ottoman troops away from the high ground of Chunuk Bair. The ANZACs launched a major offensive on a plateau known as Lone Pine. The Australians charged Ottoman positions only 100 yards distant and captured the position at a cost of 2000 casualties.
At the same time, New Zealanders charged from Gaba Tepe up the cliffs to Chunuk Bair. This was a rough path, even now the narrow passages through hogback ridges and heavy undergrowth makes one wonder at the tenacity of the men and the thinking of their commanders.
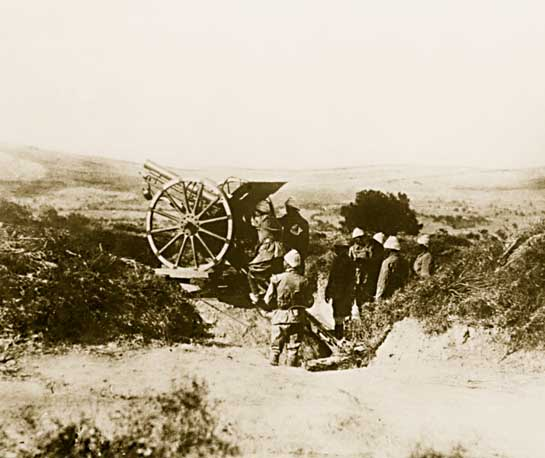
The Ottomans had a single artillery battery – 20 men – guarding the heights but the difficulty of the terrain allowed them to hold off the 20,000 troops of the attack. The NZ attack failed.
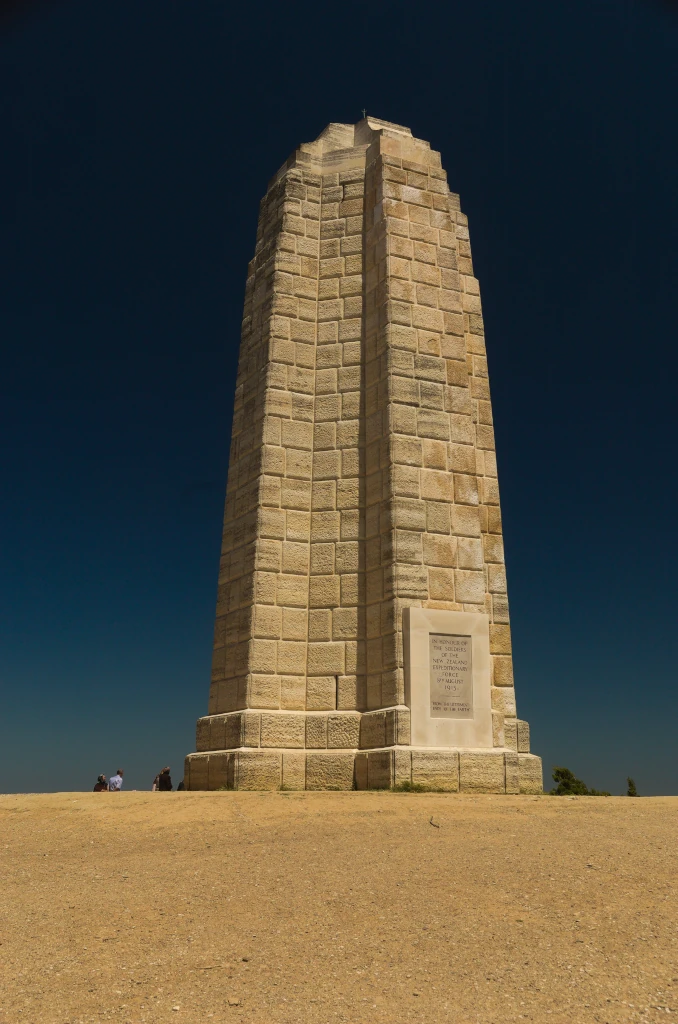
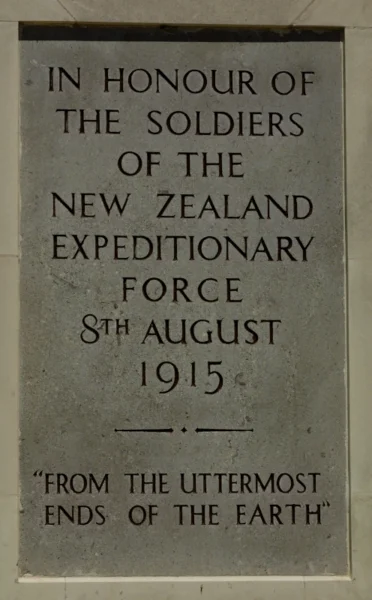
Chunuk Bair Cemetery
On August 7, Australian troops – mostly volunteers from the Australian outback – were positioned to attack. British artillery near Gaba Tepe bombarded the Ottoman positions but halted several minutes before scheduled. The delay between the bombardment and the infantry attack allowed the Ottomans to regain their defensive positions and use machine gun fire to annihilate the initial wave.
The second wave suffered the same fate. A third and fourth wave followed with similar results. Yet a New Zealand general ordered his New Zealand troops to follow once again. They too suffered horrendous casualties.
The next night, a small force of 700 men managed to take Chunuck Bair. They held the position for two days before the Ottomans retook the position. The ANZACs lost 10,000 men in four days.
But the Lone Pine position was finally held by the ANZACs until the evacuation although the fighting for that position did not let up. The Lone Pine fight produced the highest number of casualties for both sides of the campaign. Lone Pine marked the most successful advance of the campaign – yet it too was a failure in the overall plan of battle.
Commenting on the number of dead, one Australian officer stated: “the trench is so full of our dead that the only respect that we could show them was not to tread on their faces, the floor of the trench was just one carpet of them, this in addition to the ones we piled into Turkish dugouts.“
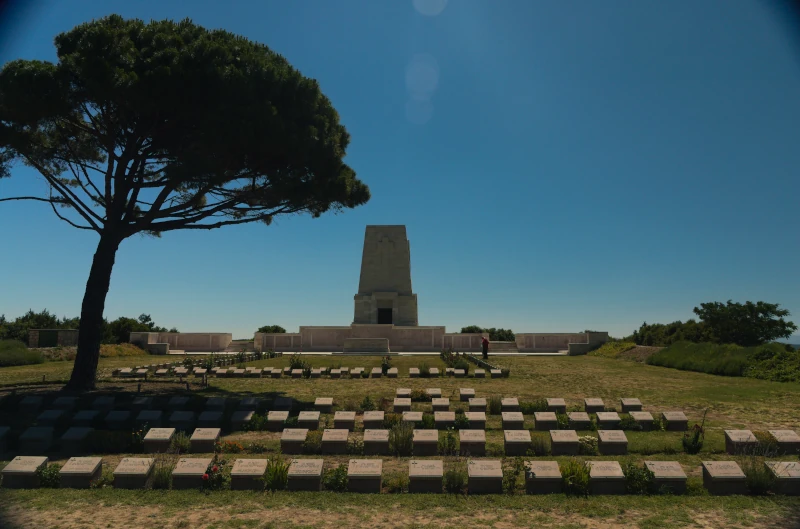
constructed by the New Zealand government
1167 graves – many unknown
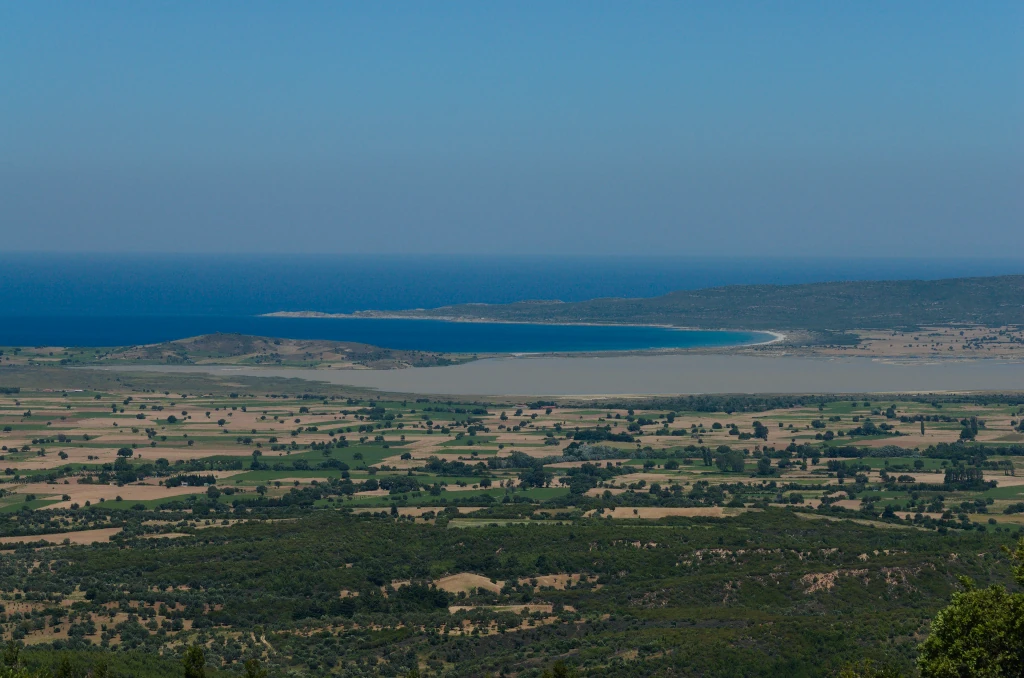
2nd Landing – Suvla Bay
There was also an amphibious landing made at Suvla Bay the night of Aug 6, just north of ANZAC Cove. Initially successful, the general in charge (Lt.Gen Stopford) mismanaged the entire operation and reached yet another stalemate. He was dismissed after a week of poor performance; considered the most incompetent of any general in the entire war. It has been said that Stopford “had no conception of what generalship meant” – in today’s terms, a DEI hire.
The landing, which commenced on the night of 6 August 1915, was intended to support a breakout from the congested Anzac sector, five miles (8 km) to the south. When 20,000 troops began landing at Suvla, they were opposed by only 1,500 Ottoman soldiers.
But the men were landed close to a mile off the intended landing point, into the mouth of a small salt lake draining into the bay while facing artillery and sniper fire.
The landing was made in darkness, leading to confusion and chaos. No one on the ground even knew where the intended target was and the rising moon allowed Ottoman snipers to pick off the men on the beach. Finally at dawn, the target was located and taken – the Ottoman troops having withdrawn in the night. Meanwhile, Stopford went to sleep onboard the ship from which he was to direct the attack. He was waken when a unit commander came on board to recommend no further attacks from Suvla Bay.
Troops were left without orders, confusion reigned, and there was a lack of drinkable water in the heat of the day. For the remainder of that day and the 8th, the men undertook efforts to carry water and ammunition to the front lines. Fighting was fierce; often with bayonets.
Bullets knocked dirt into the soldier’s faces. A bayonet charge resulted in heavy casualties; comrades shot and dying in minutes. Some soldiers were catching bombs which the Turks threw over and which had not exploded (like hand grenades) and throwing them back. Wounded and dead lay everywhere. The sun was intense and no water to be had – and little ammunition to reply to the Ottomans.
Many wounded were transported to hospital ships, died there, and were buried – unknown – at sea.
Stopford did not leave his ship during the day of August 7th; by the end of the day, command had completely broken down – yet on August 8, Stopford reported: “Major-General Hammersley and troops under him deserve great credit for the result attained against strenuous opposition and great difficulty. I must now consolidate the position held.” Which, in effect, meant he had no intent of reaching the goal of taking the higher ground.
Under pressure, Stopford ordered an advance on the evening of August 8th – in darkness, over unknown and rough terrain. Ottoman reinforcements under Mustafa Kemal had arrived on the high ground; the ANZACs, now exhausted, reached the summit at dawn on August 9.
Met by Ottoman troops already on the ridge, the fighting was intense. By mid-day, a fire started in the scrub-brush. An Ottoman officer saw the British wounded trying to escape the flames from a nearby hill:
“I watched the flames approaching and the crawling figures disappear amidst dense clouds of black smoke. When the fire passed on, little mounds of scorched khaki alone marked the spot where another mismanaged soldier of the King had returned to mother earth.“
An entire brigade was wiped out and remnants of the battalion retreated towards the beach.
On August 10, British reinforcements arrived but command was effectively non-existent. Among the reasons Stopford later gave for his inaction was that “the Ottomans were inclined to be aggressive.“
Hamilton finally dismissed Stopford (and a few others) but Hamilton himself was finally dismissed in October.
Future General George Patton was studying the Gallipoli campaign in the interwar period described that operation:
Compared to Suvla Bay, the first battle of Bull Run was a masterpiece of effective leadership. The chapter of accidents, or better, of inexcusable failures, which marked the British landing and subsequent attack at Suvla Bay, is one of the most depressing and yet instructive in military history.
Defeat
By December, the British command had had enough. Despite the intense fighting – hand-to-hand in many cases – little progress was made. Casualties were mounting, the campaign commander Hamilton requested an additional 95,000 troops but was only offered 20,000. By October, Hamilton suggested that an evacuation would cost up to 50% casualties; he was replaced.
Ian Hamilton was relieved of his command in October, and he never got another one during the war. The new commander of the operation was Charles Monro, and, immediately after arriving and noting the situation firsthand, he recommended a withdrawal from the peninsula without delay. As Churchill wryly remarked, “He came, he saw, he capitulated“. In truth, though, Monro was right; the fiasco had to end. Kitchener visited in person and agreed.
The temperatures had dropped below freezing and blizzards swept over the battlefield. The Ottomans were able to bring in heavy artillery and began bombing the trenches.
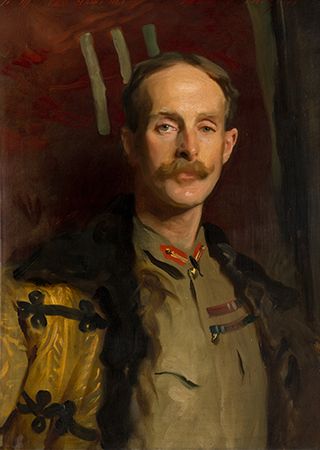
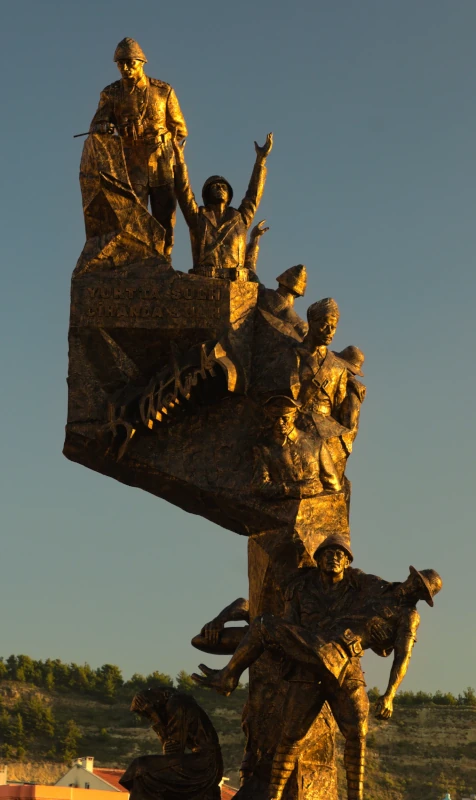
Overall commander of the Gallipoli Campaign
480,000 Allied forces took part in the evasion; there were more than 250,000 casualties with over 46,000 dead. The Ottomans also had about 250,000 casualties with 65,000 dead. Australia alone had 28,000 casualties – 8700 dead. It is said that Australia became a nation on April 25, 1915
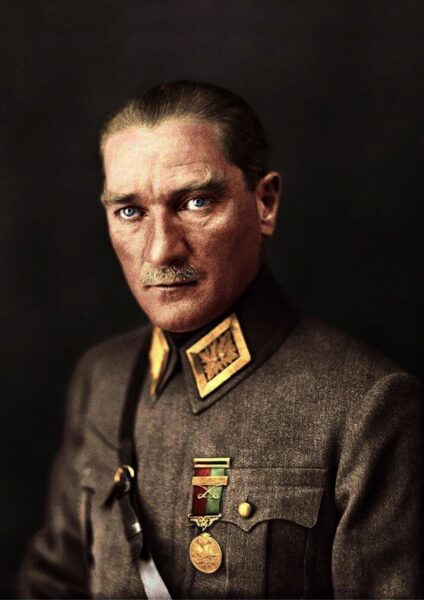
The Allies’ failure at Gallipoli owed much to Ottoman commander Kemal, who succeeded in preventing British and French forces from advancing past their beachheads in several key battles. After the fall of the Ottoman Empire in 1922, Kemal helped establish the Republic of Turkey as a secular state and adopted the surname of Atatürk, or “Father Turk” – the George Washington of modern Turkey
Today, residents of Turkey view the Ottoman victory at Gallipoli as a defining moment for the end of the empire and the birth of a new nation.
The after-effects were devastating on British careers:
Conceived by Churchill, then first lord of the admiralty, the operation’s bitter trench warfare resulted in massive casualties on both sides. The Allies abandoned the campaign 11 months later, in January 1916. Doubts had already been raised within the British government about Winston Churchill: Prime Minister Lloyd George stated “Winston is becoming a great danger, he is like a torpedo. The first you hear of his doings is when you hear the swish of the torpedo dashing through the water.” Although not entirely to blame, Churchill was forced to resign; disgraced, he retreated from politics for nearly 20 years until 1940, leading Great Britain to victory in World War II as prime minister.
Lord Kitchener lived long enough to see his brilliant military reputation fall to tatters. He drowned in 1916 when a battleship he was on hit a mine and sank – stopping a parliamentary investigation.
Other commanders suffered similar loss of respect, office, and prestige.
The campaign had failed, and Russia was left isolated from its partners in the war. By 1917, Russia was torn apart internally and the Russian Empire collapsed.
The British began the Gallipoli campaign overconfident of their abilities and under-estimating the resolve of the Ottoman leadership and troops. They had no coherent goals or plans, inadequate logistics and medical support, and inexperienced and under-trained troops, and failed to provide additional troops and weapons when badly needed. That, and an indecisive commanding general that rarely supported his men.
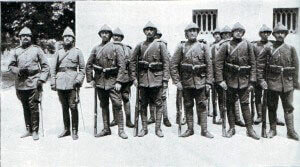
The Ottomans were deployed well: 84,000 well-equipped soldiers led by a qualified German general, Otto von Sanders, and an outstanding Turkish division commander, Mustafa Kemal. While the British generals commanded from the rear, Kemal stayed on the front lines. Future US Gen George Patton stated in 1936 that had the leadership of the two sides been reversed, the campaign would have been a success.
But it was the last Ottoman Empire success. Between crushing defeats in the Middle East and the loss of the war by the Central Powers, the Ottoman Empire collapsed in 1918. Its territories were handed out to the victors and British and French warships sailed through the Dardanelles Strait to occupy Constantinople in 1919.
The Turkish National Party, led by Mustafa Kemal, fought against the Greeks to regain land taken by forfeit after the war. By 1923, the Greeks had lost and Kemal presided over the formation of the secular Republic of Türkiye. Turks consider the battle of Canakkale the birth of the nation.
The battle for Gallipoli killed and maimed so many ANZACs that it ended up forging the national consciousness of Australia and New Zealand as peoples separate from Great Britain; the 25th of April, the anniversary of the landings, is known as Anzac Day. It is the most significant commemoration of military casualties and veterans in the two countries, surpassing Armistice Day on November 11.
All the waste, all the time, all the lives – and the Entente forces barely made a dent with occupied territory.
Close to 1 million men on both sides took part; over half were casualties – a bit over 20% of those died.
Now, when I was a young man, I carried me pack
And I lived the free life of the rover
From the Murray’s green basin to the dusty outback
Well, I waltzed my Matilda all over
Then, in 1915, my country said, “Son
It’s time you stop ramblin’, there’s work to be done”
So they gave me a tin hat, and they gave me a gun
And they marched me away to the war
And the band played “Waltzing Matilda”
As the ship pulled away from the quay
And amidst all the cheers, the flag-waving and tears
We sailed off for Gallipoli
And how well I remember that terrible day
How our blood stained the sand and the water
And of how, in that hell that they called Suvla Bay
We were butchered like lambs at the slaughter
Johnny Turk, he was waitin’, he’d primed himself well
He showered us with bullets, and he rained us with shell
And in ten seconds flat, he’d blown us all to hell
Nearly blew us right back to Australia
But the band played “Waltzing Matilda”
When we stopped to bury our slain
We buried ours, and the Turks buried theirs
Then we started all over again
And those that were left, well, we tried to survive
In that mad world of blood, death, and fire
And for ten weary weeks, I kept myself alive
Though around me the corpses piled higher
Then a big Turkish shell knocked me arse over head
And when I woke up in me hospital bed
And saw what it had done, well, I wished I was dead
Never knew there was worse things than dyin’
For I’ll go no more Waltzing Matilda
All around the green bush far and free
To hump tent and pegs, a man needs both legs
No more Waltzing Matilda for me
So they gathered the crippled, the wounded, the maimed
And they shipped us back home to Australia
The legless, the armless, the blind, the insane
Those proud, wounded heroes of Suvla
And as our ship pulled into Circular Quay
I looked at the place where me legs used to be
And thanked Christ there was nobody waitin’ for me
To grieve, to mourn, and to pity
But the band played “Waltzing Matilda”
As they carried us down the gangway
But nobody cheered, they just stood and stared
Then they turned all their faces away
And so, now every April, I sit on me porch
And I watch the parade pass before me
And I see my old comrades, how proudly they march
Reviving old dreams of past glories
And the old men march slowly, old bones stiff and sore
They’re tired, old heroes from a forgotten war
And the young people ask, “What are they marching for?”
And I ask meself the same question
But the band plays “Waltzing Matilda”
And the old men still answer the call
But as year follows year, more old men disappear
Someday, no one will march there at all
Waltzing Matilda, Waltzing Matilda
Who’ll come a-Waltzing Matilda with me?
And their ghosts may be heard as they march by that billabong
Who’ll come a-Waltzing Matilda with me?
A Hero – for the Ottomans
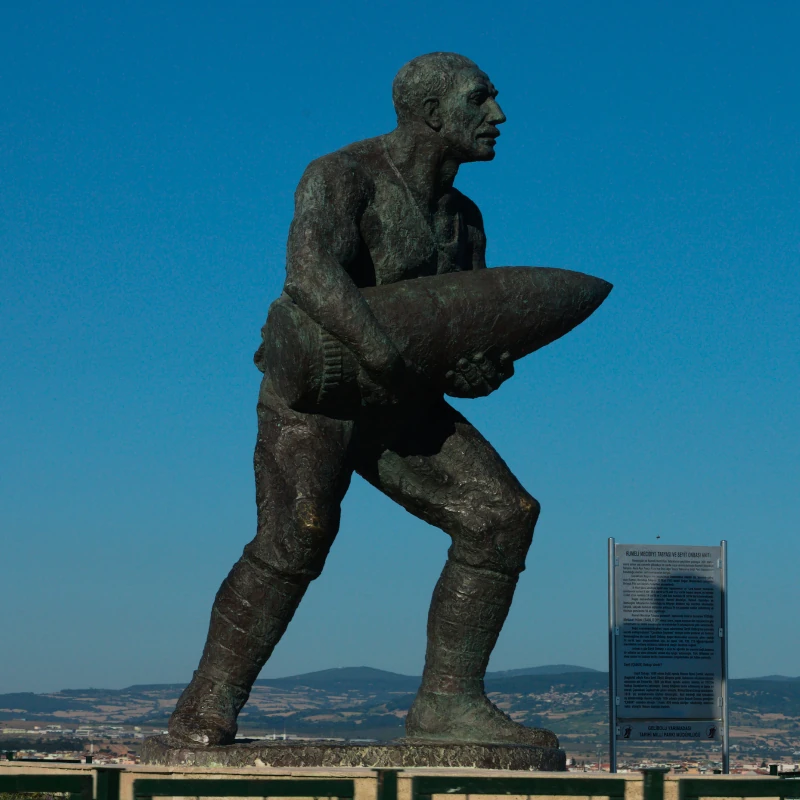
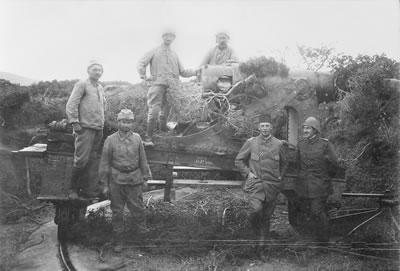
Seyit Ali Çabuk was a gunner in the Ottoman Army. He is famous for having carried three shells to an artillery piece during the Allied attempt to force the Dardanelles on 18 March 1915.
Following the heavy naval bombardment of the forts guarding the Narrows on 18 March 1915, the gun he was serving in the Mecidiye fort remained operational, but its shell crane had been damaged and the other gunners in the area were injured.
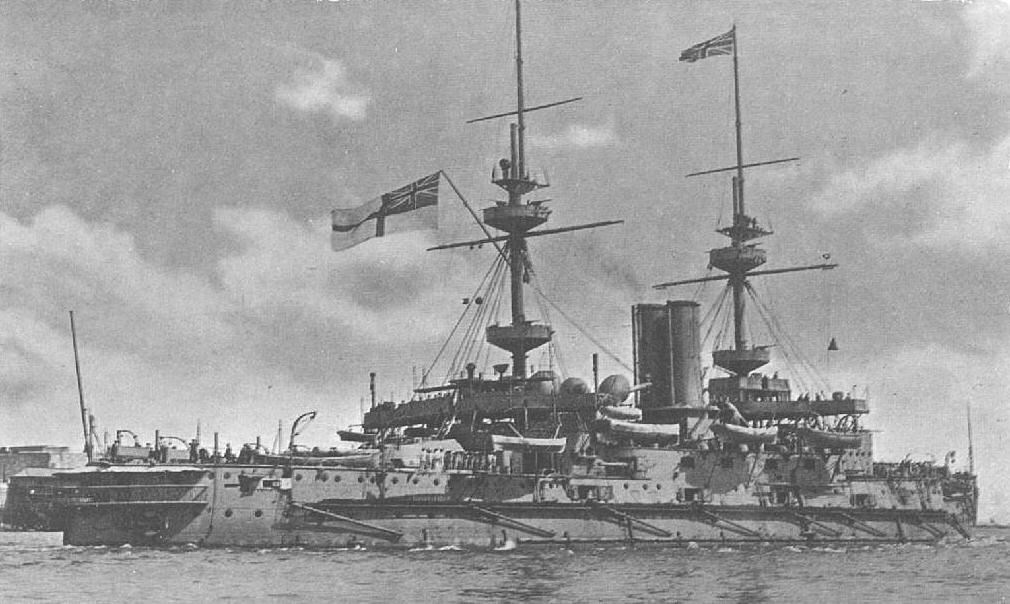
Corporal Seyit, by himself, is said to have carried three 600lb artillery shells his gun and enabled it to continue firing on the Allied Fleet. He shot three rounds at the British pre-dreadnought HMS Ocean which was trying to rescue sailors of HMS Irresistible that had been hit and disabled by a mine earlier. His first two shots didn’t inflict much damage but his third shot inflicted a severe injury to Ocean. The shot landed under the waterline of the ship, causing the ship to drift towards and hit one of the mines that the mine crew of Nusret had laid. The Ocean capsized shortly after.
He was not able to repeat the effort after the war.
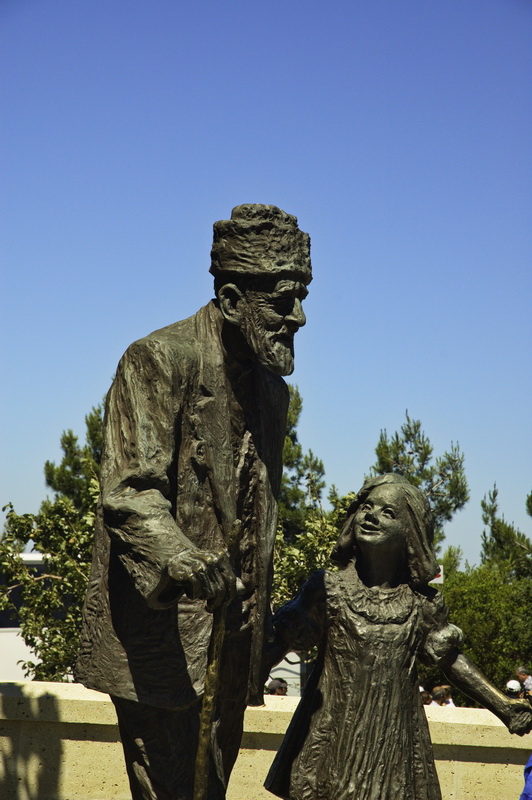
Respect to Mehmetçik Memorial
Mehmetçiğe Saygı Anıtı
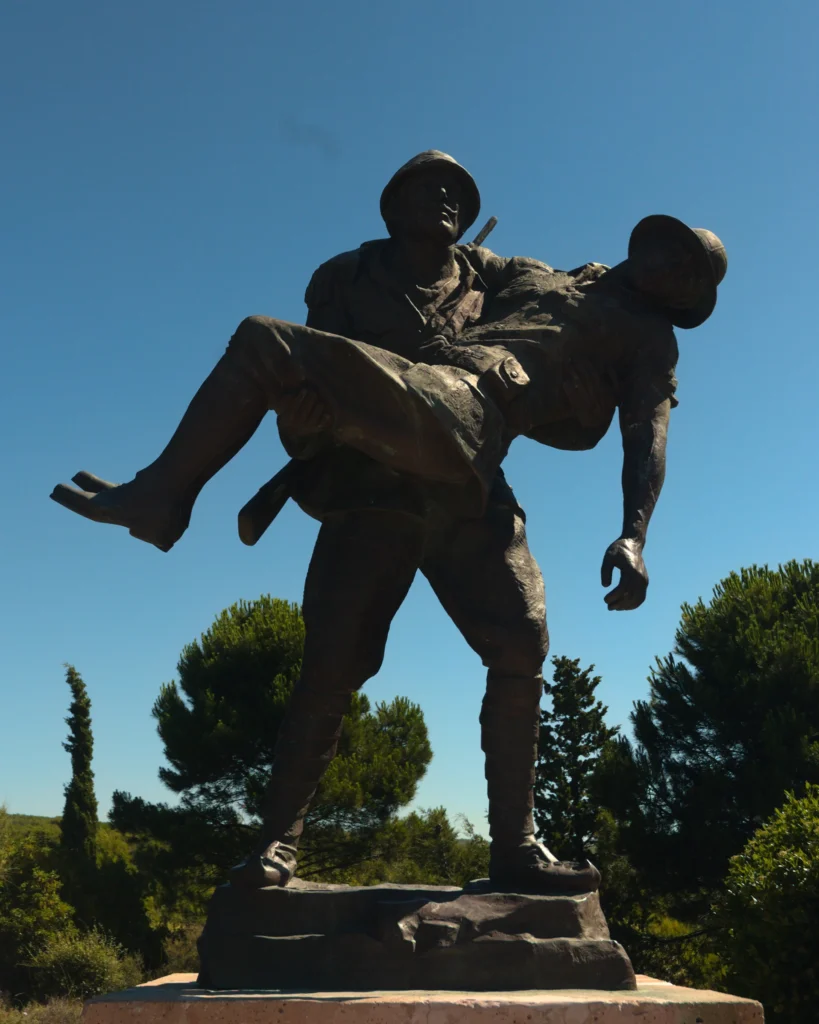
Created in 1997, the sculpture is based on an event in the Gallipoli campaign: An ANZAC soldier was shot as he ran out of his trench and lay bleeding, defenseless. During the tense standoff, a Turkish soldier tied a white piece of cloth to his rifle and raised it high as he ran out of his trench toward the fallen Australian. Guns on both sides fell silent, as the Turk carried him back to the safety of his comrades.
An Australian officer later said in 1967:
“We left the Gallipoli Peninsula fighting against the Turks and losing thousands of people but with a great admiration and appreciation for the Turkish nation and its unmatched love for its country. All Australians love Mehmetcik as if they are their own sons. Their bravery, love for its country and people, their irresistible majesty and courage in the trenches, and their love for their country is admired by all Anzacs and those are traits which should be taken as an example by all humanity. With gratitude and respect to Mehmetçik“
That officer later became Australian Governor General Lord Casey
The result was a brutal, eight-month-long clash where thousands of young men lost their lives on both sides. But there was another, more lasting result — a strange but strong mutual bond among these ordinary soldiers, who recognized and honored each other’s courage as they fought on as bitter enemies.
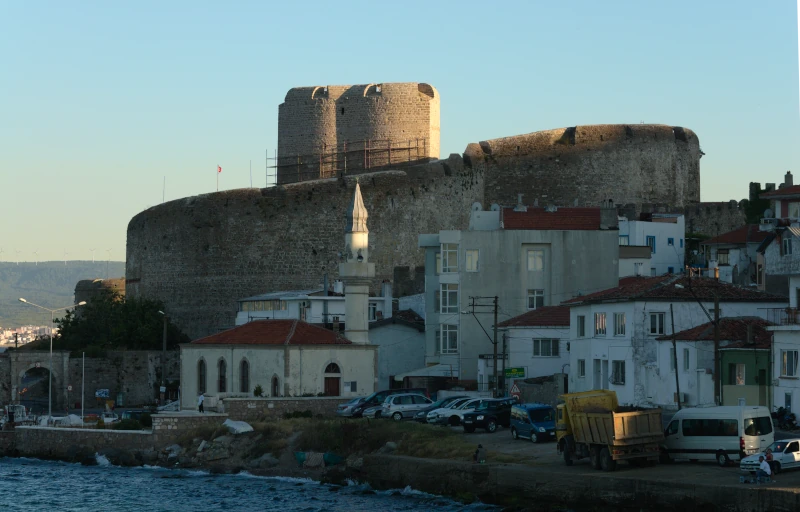
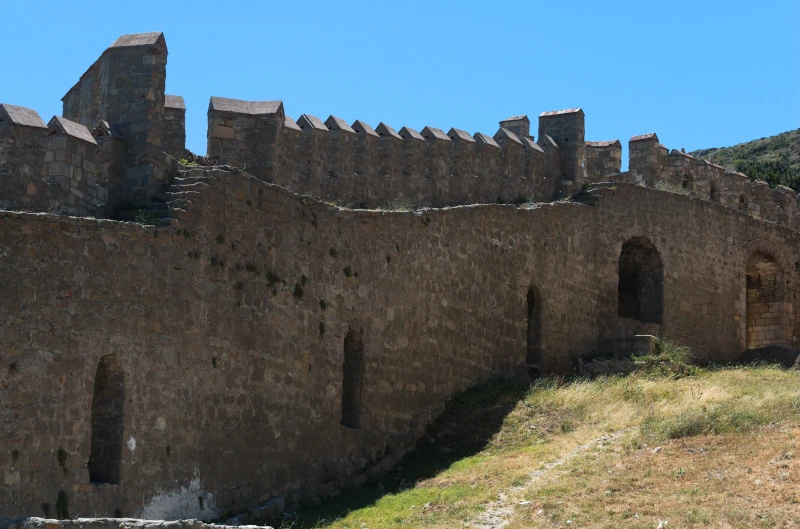
constructed in 1463 at the narrowest point of the Dardanelles Strait
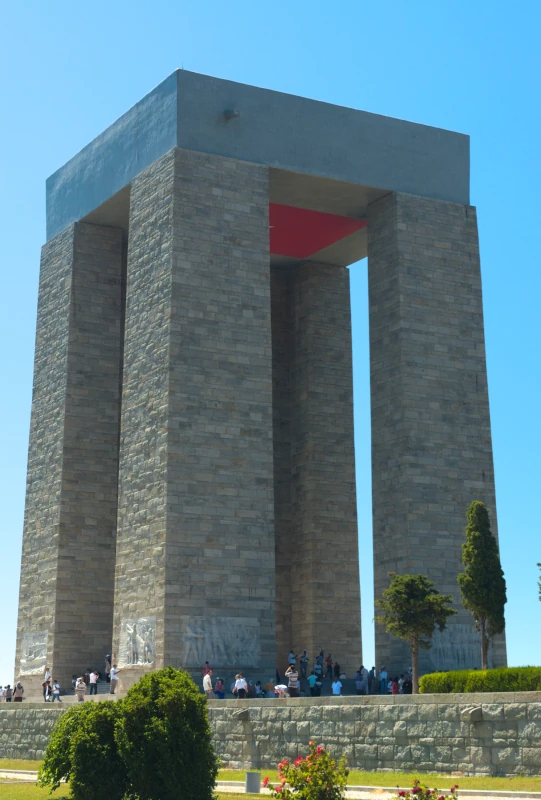
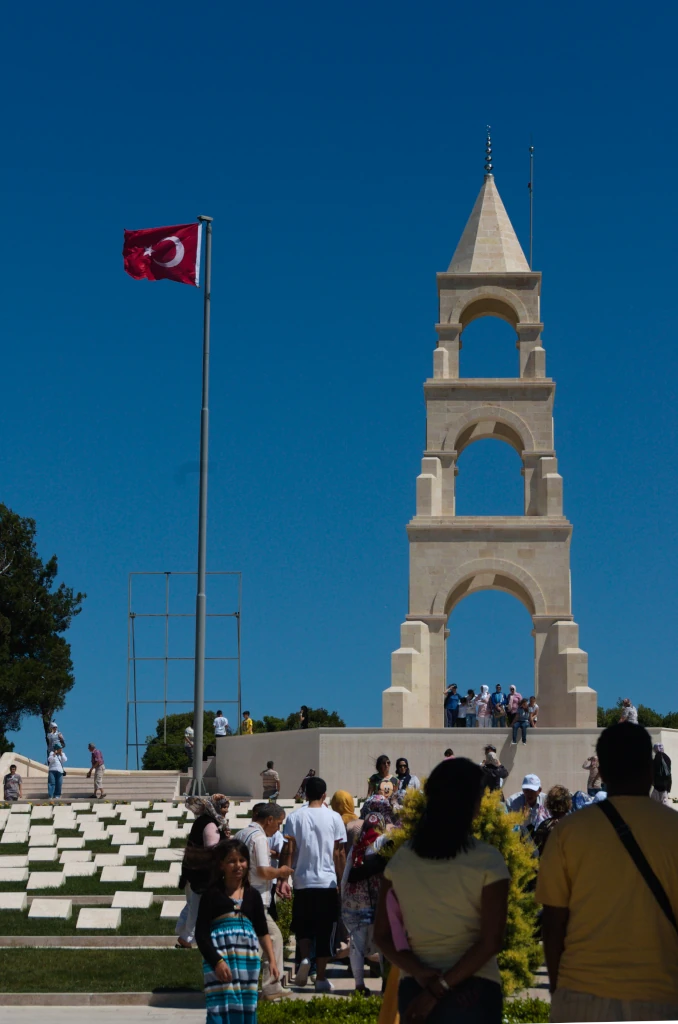
Çanakkale Şehitleri Anıtı
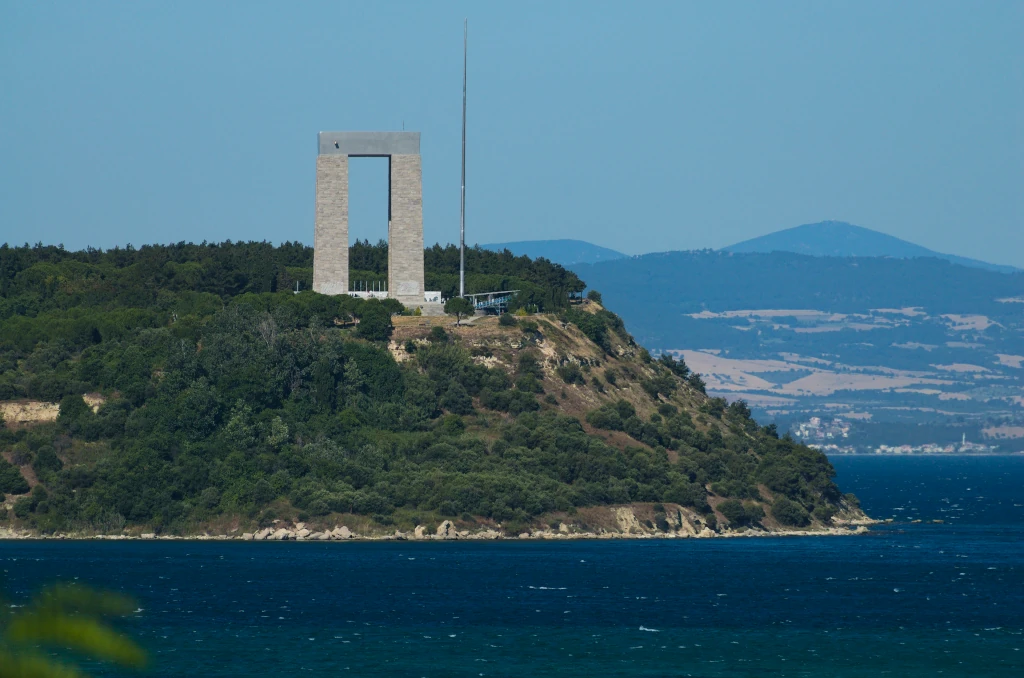
from across W Beach and the mouth of Dardanelles Strait
Do not ignore the ground on which you have walked,
It is not ordinary soil.
Reflect on the thousands of people, who lie beneath
Without a shroud.
You are the son of a martyr –
Do not hurt your ancestor,
Do not give away this beautiful motherland,
Even if you have the whole world.
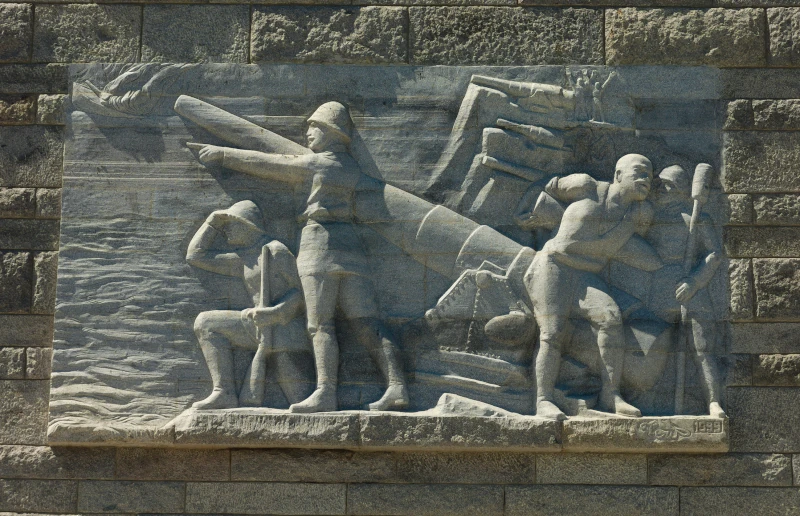
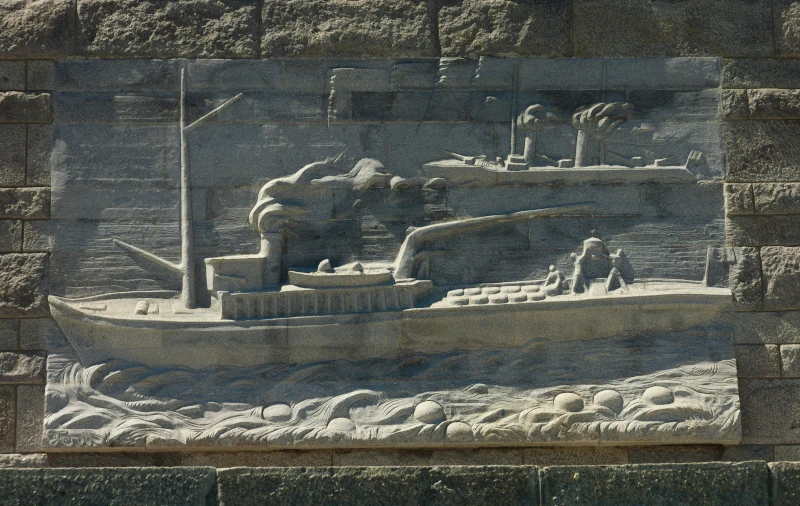
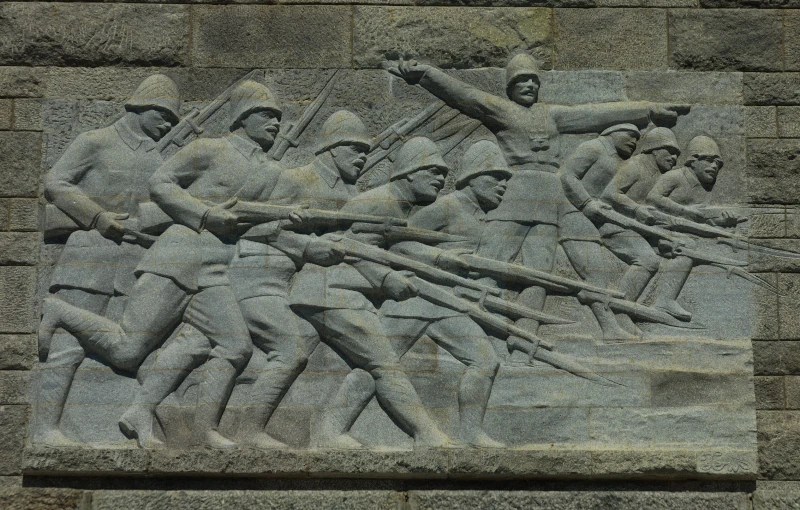
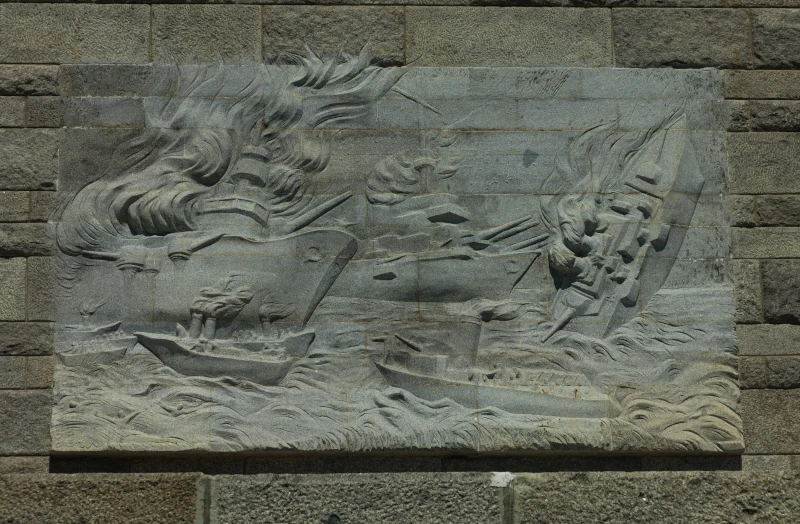
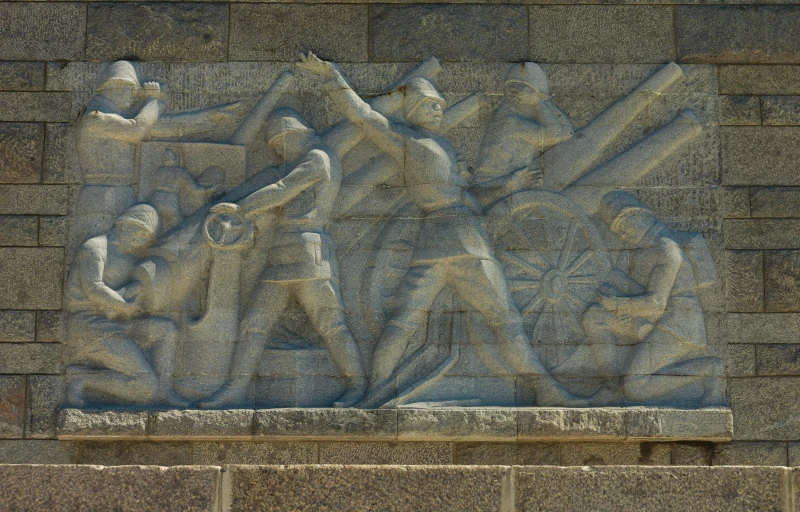
Bas Reliefs on Martyrs’ Memorial
in better light at Eceabat

Wow DT, that was simply outstanding! Thank you so much for your effort.
You’re welcome … and thank you. Strangest feeling came over me walking the battlefield. I wasn’t properly prepared but I may go back again – have to travel through the grounds to get to Mrs DT’s home.
Battlefields contain an energy that can be felt, hard to explain. Is it what is left after many men have struggled to their very last breath to try to remain alive? I have felt it at Gettysburg and Arlington and in other places, some much smaller. It must surely be there in the fields of white crosses above the cliffs of Normandy.
I have reread your excellent essay and pondered over your many beautiful pictures twice more now. I expect I’ll be back two or three more times; there is so much to digest. My first comment, and this one, was too brief and do not do your art justice. Your writing, your research, and your exquisite descriptions of these battles is extraordinary. I heartily 2nd Jean’s observation: You should be very proud of this work. DT, I strongly encourage you to drop the “read more” and put the rest of your essay on the front page! I am certain that Gerard must be nodding his head and smiling at it.
“put the rest of your essay on the front page”
I thought about it but it’s far too long. After a bit, I’ll move it to the Articles section where it can be properly ignored 🙂
I’m glad you liked it. The topic can fill books.
Can’t do it often, but I’ll put some more article-level type things up every now and then. I’m actually working on another one right now but it’s very early stages.
You should be very proud of this, DT. Amazing.